Posts

Showing posts from 2021

The real deal; Sirocco Jumpsuit

Image
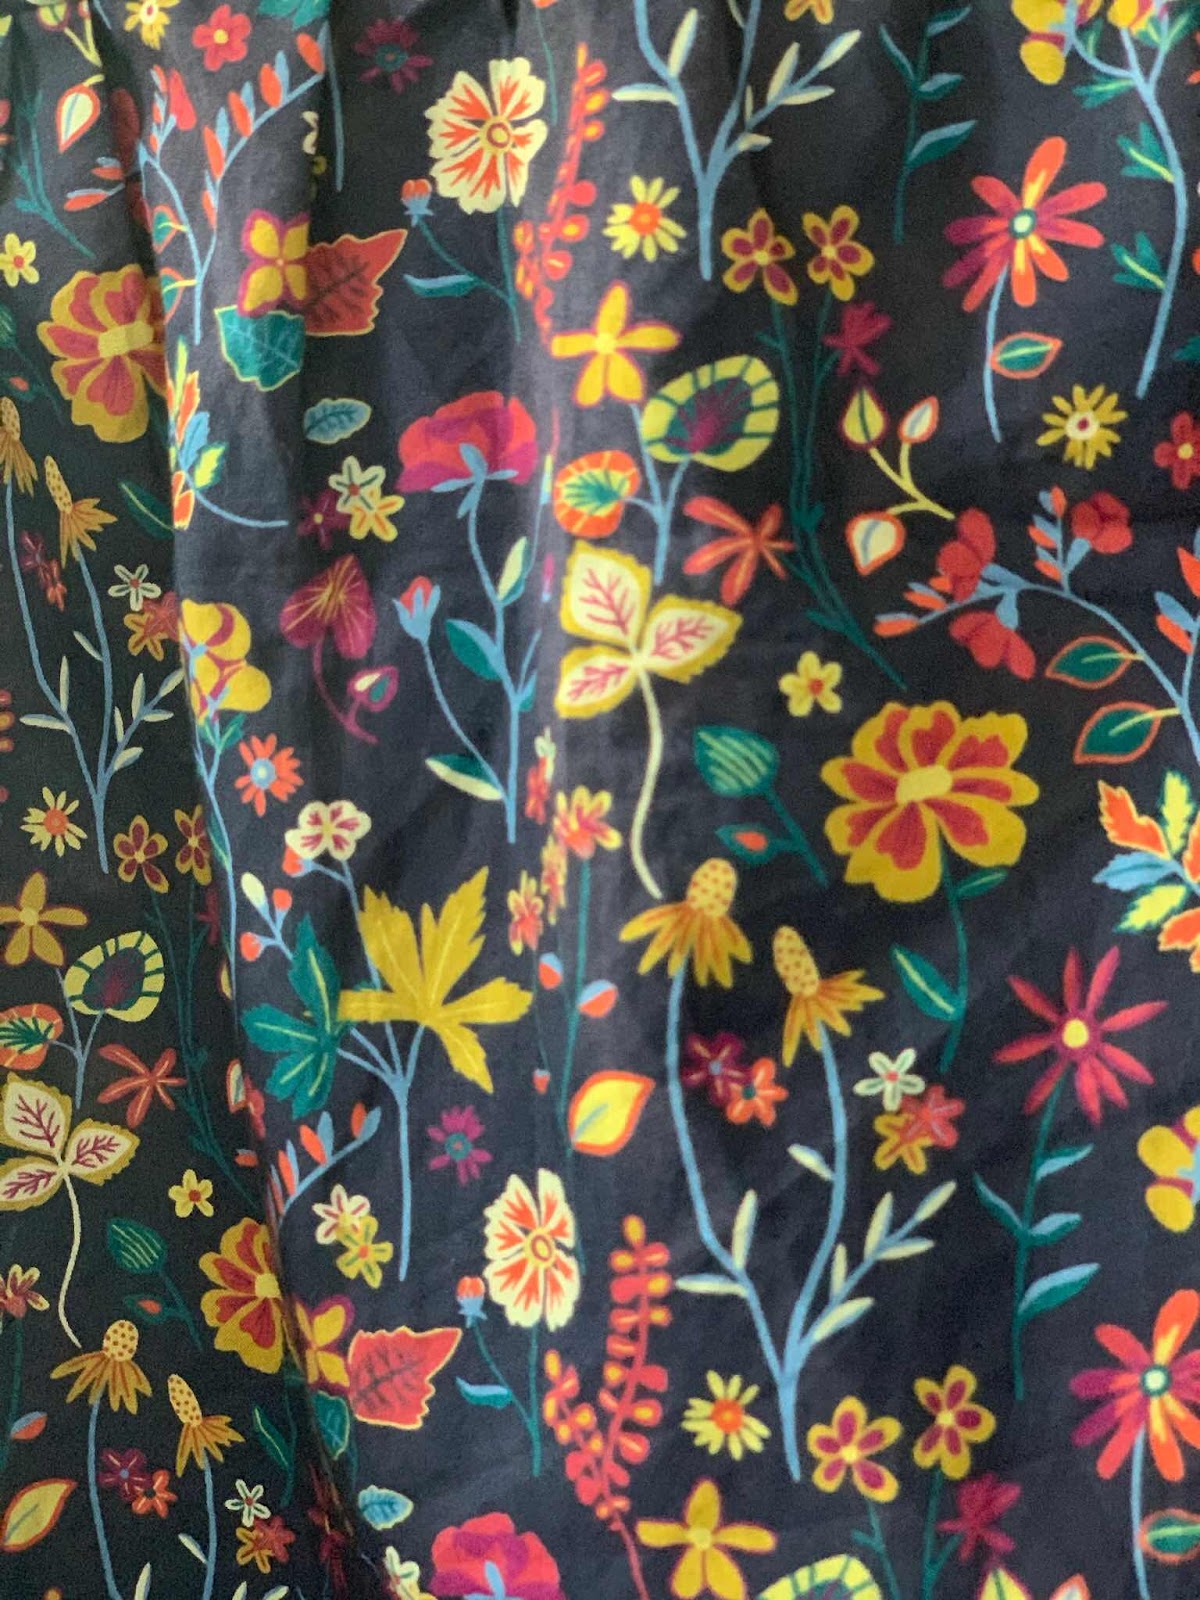
Leading into last summer, I made my toile of the Sirocco as a romper. I really liked it and it became my staple wear for those hot days when I didn't leave the house. Now, i've finally go around to making the real deal! This is the jumpsuit pattern, including the pockets and getting the pleats the right way around this time! I also sized down to to a 42 based on the fit of the toile. Constructed entirely on the overlocker makes it fast and quite easy. This is 2 different knit fabrics from Girl Charlee, the last of the fabrics that I won in my bundle at Guthrie and Ghani during the SewBrum raffle in 2019. I didn't have enough to make the jumpsuit all in one fabric, so I used the floral for the top and solid for the trousers. I ended up using the floral for the pockets as well as I didn't have enough of the solid. Luckily they coordinate together really well and look good together. The floral knit is quite a lot lighter than the solid navy though, so it's not ideal fo

The most comfy; Plaintain PJs

Image
When I made my Plantain tees, I was intending on making some making changes to the pattern. Well, this is the first iteration of them - as pajamas. My favourite pajamas to wear are from Primark. They're a long tee style that covers the butt and they're made of jersey fabrics. I decided that I wanted to try making my own! I used the short sleeve version of the pattern again. I compared the length of my favourite RTW pajamas and lengthened the Plantain pattern 7.5" to match the length. I also compares the waist curve (based on my original adjustment) and realised that it was almost exactly the same which is great because I didn't need to change that at all. I used this John Kaldor viscose jersey in both mustard and black. This was to be the first part of my me made pajama wardrobe and will match with the bottom half fabrics I bought which are Robert Kaufman Mammoth Cotton Flannel. I ordered them from Minerva and these are the first pieces to be finished because the flann

A Change of Plans; the Rigel Bomber

Image
Way back in 2019, I went to the SewBrum meetup, and of course, I picked up some fabric! This is one of the pieces I got at that time, in Barry's. It's a really lovely wool blend, grey with rainbow speckles. I originally had in mind the Morris Blazer by Grainline to make with this fabric, but on further reflection I realised I couldn't wear a blazer all that much. I currently own one blazer which I bought RTW but don't wear it all that much. When I started seeing the Rigel Bomber popping up ages ago I thought it was cool but wasn't sure if I could pull it off. Lately though, I've realised (at the age of 31 so I kinda wish it had happened sooner!) that I care a lot less about what looks good on me now and more about what I feel good in! When the Rigel bomber paper pattern went on final sale and there were only a few left, I had to have it - and then I realised that I had everything in my stash to make it except the zip! I sewed up the size M for a nice comfy fit (

Not-So-Boring Basics: Plantain Tee x2

Image
Happy Saturday! I have discovered over the last year or so that I have not very many handmade tops (my handmade tops are pretty much exclusively Ogden camis), and that combined with the fact that May was coming up and I had some fabric remnants kicking around in my drawer, it was time to try making a tee shirt! It made sense to start with a free pattern, and my love for Deer and Doe is well documented on this blog, so it made total sense to try the Plantain tee. I made the size M as that lines up closest with my measurements - and it’s a nice fit but relatively loose. It looks great tucked into high waisted jeans or shorts but I think I might try the size down next time. I did lay down my favourite RTW tee on the pattern to compare the sizing and I noticed that heather Plantain had a lot more flare at the hip, so I adjusted the side seams. In the end I took them in 2 inches total at the bottom, going to nothing at the top. As these were essentially wearable toiles for a future planned

Liberty Leftovers; a Myosotis Hack

Image
While I was sewing up my Liberty Myosotis dress, I remembered that I actually had this fabric in another colour way. This is also the Liberty Lawn called Botanist’s Diary, only in the other colour way than the blue! I bought this fabric after I made my Kelly, and used it for some selfless sewing to make my Mum (an actual, real life botanist!) a Sew Over It Sylvia robe for Christmas. She loved it and wears it, and it really felt like kismet - the name of the fabric, the gorgeous print, and the perfect colourway for my Mum! But I did have leftovers which I wanted to use for something for me. I didn’t have enough for a dress (I briefly considered colour blocking a dress with the blue colour way but decided it would be too much, even for me), and while I have a gap for blouses in my wardrobe I don’t really wear any tops that aren’t stretchy, so that seemed redundant. Then I realised a fun skirt for summer would be perfect in this kind of fabric! I wanted to make something gathered and cute

Fancy Not-Pants; a Liberty Myosotis

Image
My Myosotis toile was the practice for this garment! If you have seen this blog before (hi again!), then you will recognise this fabric. When ordering the fabric for my Kelly Anorak, I fell in love with the Liberty print Botanist's Diary, which was the perfect match for my outer fabric. And when ordering it, I may have *accidentally* put 5m in my cart, which was a crazy expense and wayyy more fabric than I knew I'd need - but then it came in handy! I had it in my mind to also make a dress using this fabric with what was leftover. I will, however be avoiding wearing them together as that would actually be too much! As soon as I made my first Myosotis (in black and white check cotton), I knew I would be making more. I had plans in my head about 3 others, one of which is made (this one), one which is cut out (in petrol blue double gauze), and another which currently only exists in my head (in broderie anglaise). I briefly contemplated using the other colourway of Botanists Diary (

Longest Stash Fabric; a BHL Hannah Toile!

Image
This fabric has been long lingering in my stash - I bought it years and years and years ago (I think I was still living in Canberra at that point, which makes it about 7 years ago?!) from Spotlight. I was drawn to the blue and white aethestic that reminded me of Delft pottery with the lovely colours and patterns, and the lightness of the lawn. However, the problem was that as it is on a white base, it was a little bit too see through for me to use at that point. So into the stash it went for a while - a long while! When I decided to try wrap dresses, there were 2 patterns I had in mind. The first was the True Bias Calvin, which is lovely but a bit of a departure of my usual style and which I have already made a top and dress with. The other was much closer to my style, but still a wrap - the By Hand London Hannah dress. I made a size 12 with no adjustments, using the regular sleeve for the toile. The fit is quite lovely - I feel like I may be between sizes and could maybe go down one,

Another Ruby; Winter Wool Edition!

Image
Yes, it's another Ruby dress! I was browsing Minerva Fabrics for other things a while back, when I spotted this wool blend fabric. And I love a wintery plaid! When Minerva then emailed me to say that it was only available in 2 separate lengths, no problem! It was easy to fit the skirt pieces on one length and the bodice on the other. I went with my usual size (M with a dropped bust dart), but used a lining. I personally really don't like a facing so I cut 2 bodices and line it, hand sewing it to the skirt to also enclose the waist seam. For this, making the entire bodice out of wool seemed, well, inadvisable, so I lined it with some of the black sandwashed silk left in my stash. It is a bit easier to sew than some of my other liing facrics and I like the feel of it. The other thing I bought to make this project was some bias binding. I decided that for the wool it needed a bit of nice bias, so I bought some black satin bias binding to go around the hem. Every time I make a Ruby

A Super Fast Turnaround; The Lahja Dressing Gown

Image
This garment is definitely the fastest turnaround, from fabric ordering to having a finished garment. It was less than a week! I had been seen the email for one of the Guthrie and Ghani kits, to make the Named Patterns Lahja dressing gown. I had dismissed it at first, thinking I wouldn't wear a dressing gown, but being at home more meant I wasn't rolling out of bed and straight into the shower every day and I actually would wear one in the mornings. So I had a look at patterns, then decided that the Lahja was the right pattern. But by then the kit had almost sold out (plus I did some maths and realised that buying the fabric and pattern separately were cheaper!), so I went onto the Guthrie and Ghani website itself and bought the same fabric through them directly. I picked the sage green in the waffle cotton for my dressing gown - I had thought about navy blue, but consciously made the choice to NOT add more dark blue to my wardrobe. The fabric arrived in just a few days, I had

Summery Carolyn Pajama Set

Image
Double gauze first came onto my radar when I saw a few other makers making Myosotis dresses out of it. I've not sewn with it before but I was intrigued about it! So I bought some in this gorgeous navy blue from Fabric Godmother, but while I have some more for a Myosotis cut out, this one I thought would make excellent summer pajamas. I made the same size as my last set of Carolyns, a 10 in View C with the piping. I had always planned a pair in navy but was planning to use lawn. This was a better use of the fabric - it's light and breezy and very soft - perfect for lounging. I used the silver piping I bought in Hong Kong several years ago, and sparkly buttons which I bought last year in John Lewis (like a magpie because I apparently am attracted to shiny things!). It gives this set a real fancy touch. It was a little bit frustrating to work with, as it turns out the piping unravels very fast, but a little bit of fray stop and some hidden zigzagging solved that problem pretty sat

The Most Successful Toile; A Myosotis Trial (and Toile)

Image
Hiya all! Now that I have posted all my catching up makes, I am up to the most current makes! I have developed a new strategy - spend the half term (or part of the holidays) cutting out things and then I have lots of projects set up for the term time, when I can actually only get a half hour or so of sewing time in and I don't have time to cut things out! I cut out 6 things for the last half term and all but two are finished (I have one dress which isn't even started, but also a bomber which only needs a zipper which is almost finished!), so I'm currently at the point where I'm thinking about the next set of things. Add to that the fact that I finally got a hair cut (thanks to lockdown easing!), so I thought I'd snap a few pictures of my most recent batch of makes. This dress is potentially the most successful thing I've ever made - definitely the best toile! I've worn it at least once a week since I made it - sometimes 3 times in a week, when I'm at hom

The Coolest Fabric Ever?; Popsicle Moneta

Image
This make is the last from batch 2 of my photographing technique. This was one of the dresses I made in lockdown #1, actually, in May of 2020. I got a tipoff from my fabulous sewing friend Chloe about some amazing fabric she had seen online. It was from 1st for Fabrics, and it was a UV reactive fabric! This sounded really interesting, so I jumped online a bought this fabric (which is not the same print, but another very cool one). I wanted to get something lighter in colour for the spring and summer months, as I don't actually wear very much in cream or white that isn't a plain tank top! This is another Colette Moneta, but rather than the 3/4 sleeve for a more summery look. This meant I needed to reprint the sleeve  piece in the short sleeve length (as I had 3/4 printed previously). I made the same size M (8-10) as usual and made the same adjustment to the sleeve as on my other sleeve piece by removing 1" out of width of the sleeve head. Really there's not much to say